Log in Try it free

What's new

Getting better with your ideas.

See what changed in each version, learn how every feature works, and tell us what to improve or add next.

Current version v1.6November 4, 2026

Updates

Small improvements get the next number: v1.1, v1.2… A big update becomes v2.

  1. v1.6

    Halftone, credits and new garments Current

    • New
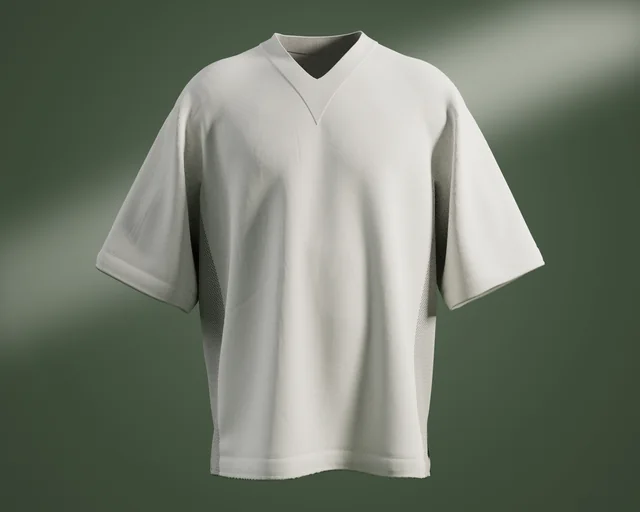
      New model: Hockey T-shirt. Short sleeves, mesh sides, a back yoke, shoulder pieces and a name patch on the back that you can switch off right on the 3D view. On Pro and Ultra.
    • New
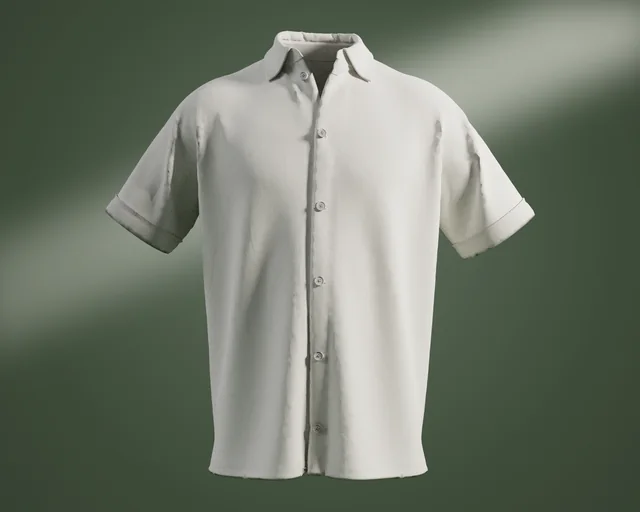
      New model: Short Sleeve Shirt. A button-up shirt with a collar on a stand and stitched buttonholes. Your design moves between a T-shirt's front and the shirt's two halves by the button line. On Pro and Ultra.
    • New
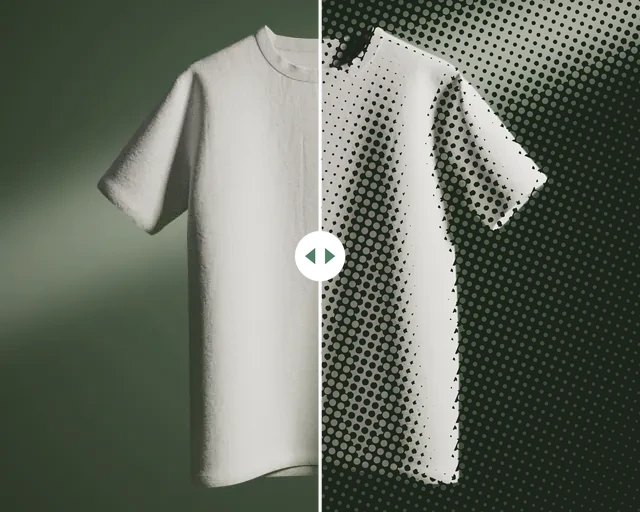
      Halftone for DTF printers. Turns a picture into dots, lines or engraving, so a big print feels light on the garment instead of one solid piece. Its own window shows the real print, dot for dot, before you apply it. On Pro and Ultra.
    • New
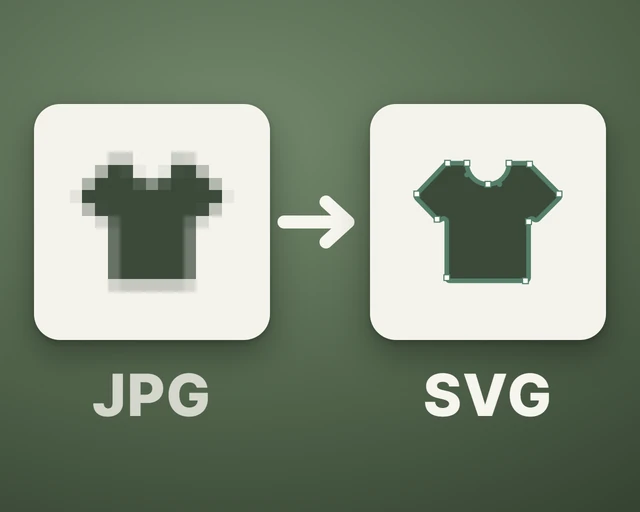
      Vectorize and Upscale. Turn a blurry logo or lettering into sharp shapes that print clean at any size, or make a photo bigger and sharper for print. You see before and after on your fabric colour first.
    • Credits. One wallet for cloud renders, Vectorize and Upscale, filled every month with your plan. Used them up early? Top up any amount at any time.
    • Cloud renders keep your fabric wrinkles. Exactly as in your 3D view: off when you switch them off, and at the strength you set.
    • Magnet for several designs. Several selected designs dragged together snap to a piece's centre lines and to other designs, just like one.
    • Clean seams and smooth wraps. No more light specks along the seams or a thin line inside the collar when a print covers a garment of another colour. With Wrap over seams, a print lies smoothly on the hoodie pocket and carries on over the sleeves, with no wavy lines or stripes where it meets itself.
  2. v1.5.1

    A lighter 3D view and hoodie fixes

    • Lighter 3D view. It rests when nothing changes and gets lighter by itself on slower laptops, so the editor stays smooth.
    • Inside of the sleeves and front. Now on the Inside tab, so the inside you see at the cuffs can be painted too.
    • Hoodie pocket. Colours and prints cover its opening edges, and Wrap over seams works on it.
  3. v1.5

    Motocross gear

    • New
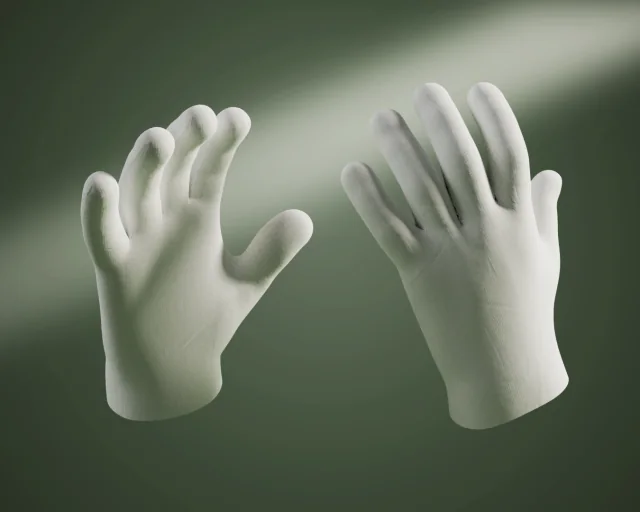
      New model: Motocross gloves. A pair with fourchettes between the fingers; Wrap over seams and prints inside work on them too. On Pro and Ultra.
    • New
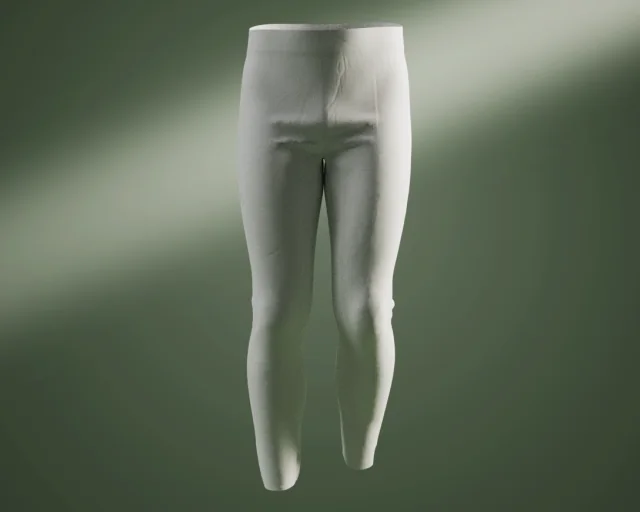
      New model: Motocross pants. Thighs, shins, back panels, side strips, back yoke and waistband at real size; Wrap over seams and prints inside work on them too. On Pro and Ultra.
    • Recolour pictures. Hue, saturation and a flat fill colour for any picture, under Selected item.
    • Seams on gradient fabric. No more white thread or specks along the seams.
    • Clean seams inside. Designs on the Inside tab now reach right up to the seams.
  4. v1.4.1

    Fixes: smooth turntable videos

    • Smooth turntable videos. Export → Turntable video now makes every frame at an even 30 frames a second, so the garment turns smoothly, with no jumps. It is also much faster to make.
    • A steady picture while it records. The 3D view no longer looks squeezed while a turntable video is being made.
  5. v1.4

    Sport jersey, relaxed long sleeve, fabric gradients and materials

    • Sport Jersey. A fitted long-sleeve sports jersey with breathable mesh side panels, in three poses: arms out, arms bent and arms down. On Pro and Ultra.
    • Long Sleeve Tee, relaxed fit. A cotton long sleeve with a ribbed neck, on the body in three poses and flat on a hanger. On Pro and Ultra.
    • Gradient fabric. Choose Gradient under Colour to blend the garment from top to bottom. Drag the colour markers to move them, drag the diamond between two colours to make the blend softer or sharper, and click under the bar to add up to 5 colours.
    • Gradients on shapes. The same editor for your shapes, straight or round, at any angle.
    • Fabric material. Choose what the garment is made of under Appearance → Material: cotton, cotton blend (smooth), interlock, sport knit (polyester), piqué, rib knit, waffle, fleece / French terry or athletic mesh. The fabric surface in 3D and in renders changes to match.
    • Real ribbed necks and cuffs. Rib trims now have their own knit texture.
  6. v1.3

    Holiday backdrops, vector print files and more control over the backdrop light

    • Holiday backdrops. Soft Halloween and Christmas shadows on the backdrop: spider webs, pumpkins, spruce branches, string lights, frosted glass and more. Find them under Backdrop light on the Scene tab.
    • Gothic fonts. Eight blackletter fonts in a new Gothic group in the Font list of the Text tool, from sharp fraktur to softer gothic. You can use them on products you sell, and they export as vector outlines like any other text.
    • Backdrop brightness and contrast. Two new sliders in Scene make the paper lighter or darker and the light and shadow on it softer or stronger.
    • Invert light. Swap light and shadow on any backdrop light: leaf shadows become leaves of light.
    • Wide pictures look full. In 16:9, 4:3 and 1:1 renders, leaves, palms, branches and blinds now reach the edges of the picture instead of fading into plain paper.
    • Upload vector, get vector. Upload an SVG, PDF or Illustrator (AI) file, and Print files gives it back as vector at real size (SVG or PDF), next to the PNG.
    • Text and shapes as vector. Text and shapes you make in the builder come out as SVG too, with the letters turned into outlines, so your printer doesn't need your fonts.
    • Original or PNG only. Choose the file type in the Print files window. Vector files come with paid plans.
  7. v1.2

    Sublimation panels, 360° videos and prints across the seams

    • Sublimation panels (ZIP). Each pattern piece as one full file at 300 DPI, filled edge to edge with your fabric colour, with 5, 10 or 15 mm of bleed. Add a dashed cut line, or mirror the files for transfer printing. We warn you if a picture may print blurry.
    • Turntable video. A short 360° video of your garment for Reels and stories, in 9:16, 4:5 or 1:1. One turn in 6, 8 or 10 seconds.
    • Wrap over seams. Your artwork continues across the side seams onto the back, the way it would on a sewn shirt, and the print files follow.
    • Crop a picture right on the pattern. Drag the edges to hide what you don't need, or trim empty edges in one click. Your original file stays as it is.
  8. v1.1

    Print files, a spec sheet and renders in the cloud

    • Print files (ZIP). Every print on your garment comes as its own PNG at real size and 300 DPI, ready for any print shop. Before you download, we check your pictures and tell you if one would print blurry.
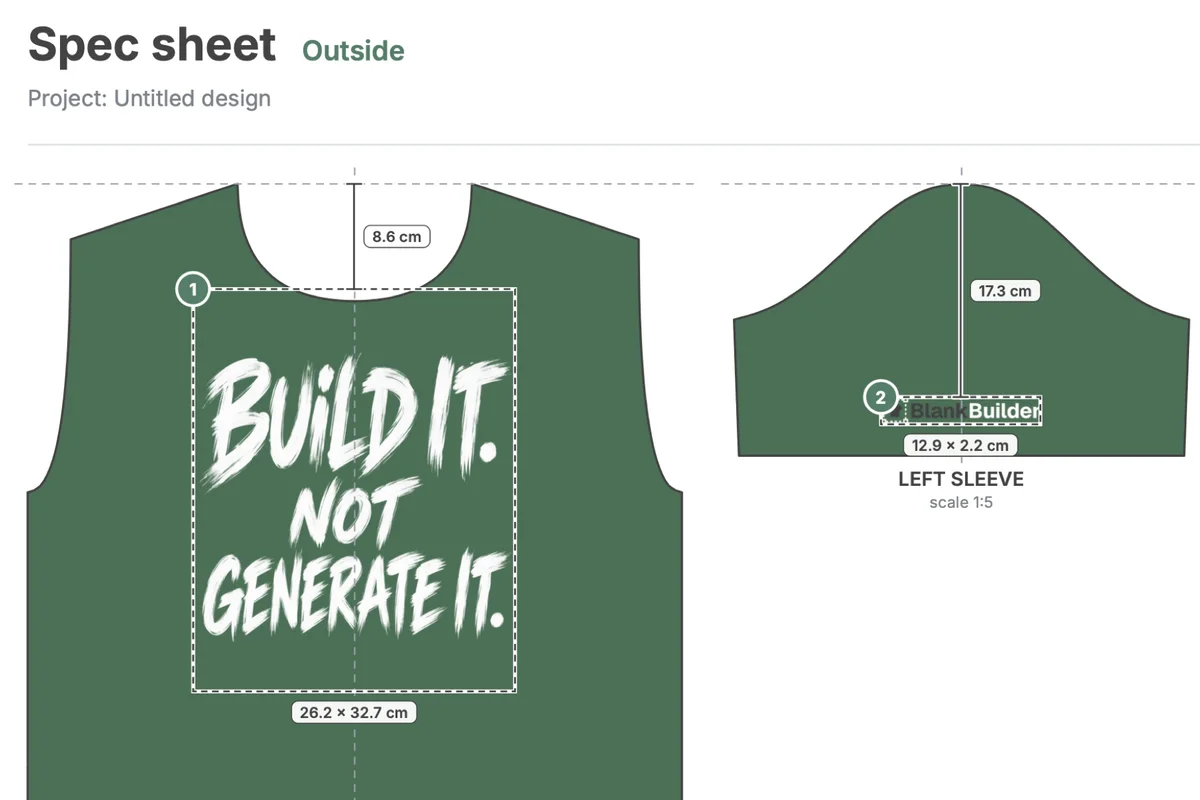
    • Spec sheet (PDF). A clear page with the size and position of every print, in cm or inches, for sewing and production.
    • Photos, print files and a spec sheet from one design. Everything you need to sell it and make it, in one place.
    • Your shirt is a different size? Tick My shirt is a different size, enter the width of its front, and the print files and spec sheet are scaled to fit.
    • Render in cloud. Our servers make your studio photo, so it works on any laptop or tablet. Close the window if you like: a green ring shows the progress and we let you know when it is ready.
    • Save each render as PNG (full quality) or WebP (smaller, for your web store). One click sets the recommended catalogue size, 2000 × 2500.
    • My renders and Your files. Your projects and cloud renders in one window, with a bar that shows how much space you use.
    • The Sewing pattern panel. The flat pattern view has its own name and button, so you switch between Sewing pattern, Split and 3D in one click.
    • Cloud renders a month: Basic 3, Pro 50, Ultra 300 (since v1.6 they are paid with credits). Rendering on your own computer is free on Pro and Ultra.
  9. v1

    The first version

    • Design on real sewing patterns. Put pictures, text and shapes on the front, the back, the sleeves and even inside the garment.
    • Live 3D preview. Every change shows at once on a 3D garment. Turn it and zoom in to check every detail.
    • 19 garments: T-shirts, polos and hoodies, flat, draped or on a body. Switch the model and your design stays where you put it.
    • Make the fabric yours: colour, wrinkles, texture, knit size and a label inside the neck.
    • A ruler in cm or inches shows the real size of every print.
    • Catalogue render: photo-quality studio pictures with real light for your store.
    • Works in your browser. Save your projects to your account and open them on any computer.
    • Four plans: Free, Basic, Pro and Ultra.
    • The builder speaks English, French, Chinese and Russian.

Guide

Create your design, make catalogue images and prepare files for production.

01

Make your design

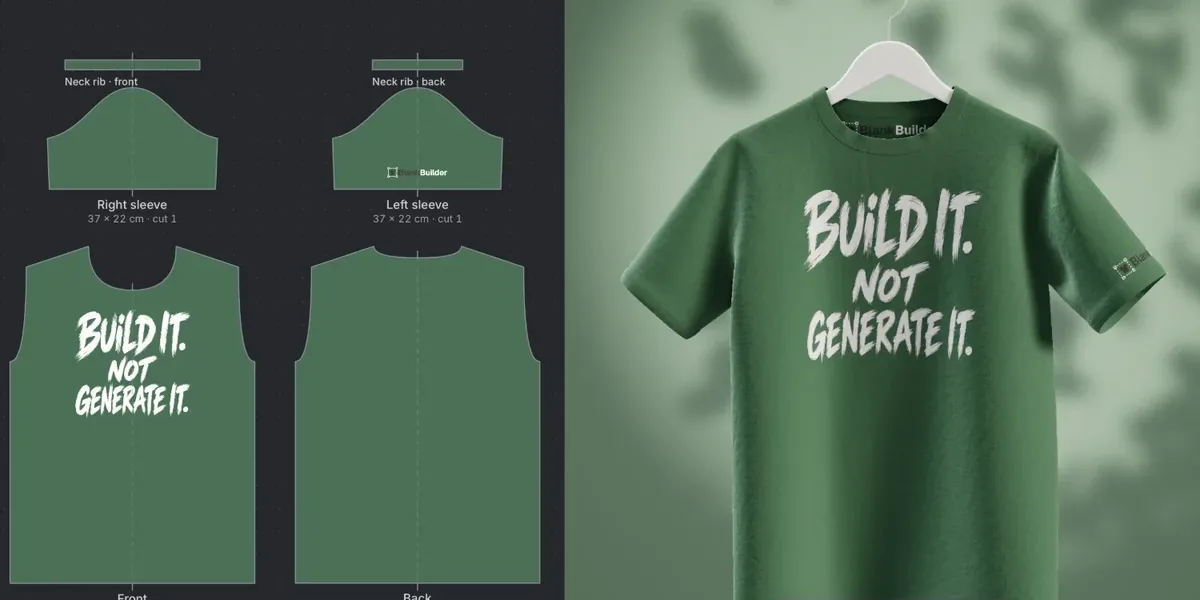
The sewing pattern with the print on the front, and the same T-shirt in live 3D
  1. Open the builder. Click the model name above the 3D preview and choose a T-shirt, long sleeve, sport jersey, polo or hoodie in Models.
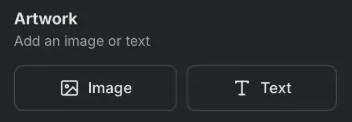
  2. Under Artwork, click Image or Text. You can also drag PNG, JPG or SVG files onto the pattern.
  3. Low-quality logo? Upload it even as a JPG or a blurry PNG, select it and click Vectorize: it turns into sharp vector shapes that print clean at any size.A blurry JPG T-shirt turned into a sharp SVG
  4. A small or blurry picture? Select it and click Upscale: Crisp makes it bigger and sharper and keeps your details, Creative also redraws fine details. Vectorize and Upscale use credits; the same picture again is free.
  5. Move, scale and rotate your prints. Use Inside for labels and Split to see the pattern and 3D side by side.
  6. Select a picture and click Crop to hide part of it, or Trim empty edges. Turn on Wrap over seams and a print that runs past the edge goes on onto the next piece.
  7. Pick the colour under Fabric, or choose Gradient to blend it from top to bottom: drag the colour markers and click under the bar to add up to 5 colours (shapes have the same gradient). Under Appearance, choose the Material and set wrinkles, texture and knit size. Click Save project to continue later.
02

Create catalogue photos

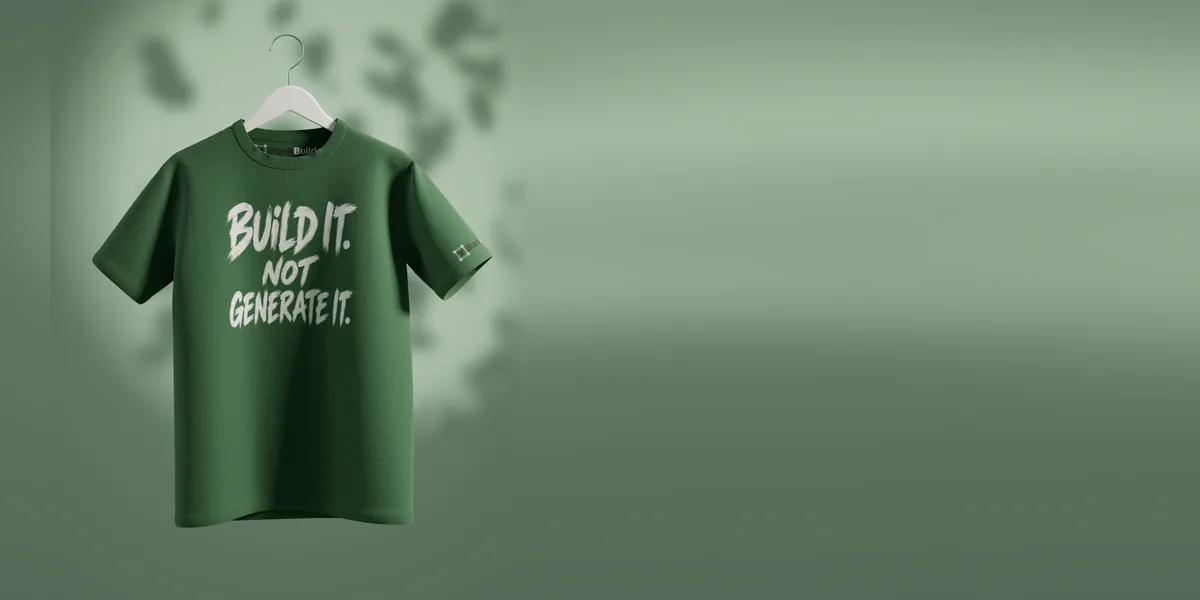
A studio render of the T-shirt on a hanger
  1. Turn the garment to the angle you like. On the Scene tab, set the backdrop colour, the backdrop light and the key light.
  2. For the holidays, open Backdrop light and pick a 🎃 Halloween or 🎄 Christmas shadow. Fine-tune it with Invert light, Backdrop brightness and Backdrop contrast.
  3. Choose Export → Catalogue render. Click Recommended for catalogue: 2000 × 2500.
  4. Click Render in cloud: usually 1 to 2 minutes. On Pro and Ultra you can also choose Render on this computer.
  5. Click Save PNG for full quality or Save WebP for smaller web files.
  6. Want a video? Choose Export → Turntable video: one 360° turn in 9:16, 4:5 or 1:1, for Reels and stories. Paid plans.
03

Prepare production files

  1. Choose Export → Print files (ZIP) or Spec sheet (PDF).
  2. For another garment size, tick My shirt is a different size and enter the width you measured.
  3. Uploaded an SVG, PDF or AI file? Choose Original to get it back as vector, or PNG only.
  4. For sublimation or all-over print, choose Sublimation panels (ZIP): each pattern piece as one full file at 300 DPI, filled with your fabric colour. Pick the bleed, add a cut line, or mirror the files for transfer printing.
  5. Printing DTF? A big solid print feels like one heavy piece on the shirt. Select a picture and click Halftone to turn it into dots: choose a style (Classic, Colour dots, Palette, One colour or Comic), the Dot size and Dot shape, check the preview and click Apply. The print files get it too. Pro and Ultra.
  6. We check your pictures before export and warn you if one is under 300 DPI. Print files come at real size and 300 DPI.
  7. The spec sheet shows each side with print sizes and how far each print sits from the top and the centre. The ZIP includes it too.

One design. Matching photos, print files and specifications.

04

Manage your files

  1. Your projects, cloud renders, spec sheets and print files are kept together in Your files.
  2. Open it with the folder button at the top of the builder, or from the account menu: My projects or My renders.
  3. Storage: Free 50 MB · Basic 200 MB · Pro 500 MB · Ultra 2 GB.
  4. Space full? Delete old files to free it at once, or keep a render on this device only.
  5. After a paid plan ends, you have 30 days to renew or download your files; after that, what does not fit in the Free space is deleted.
05

Credits and plan limits

Credits pay for the work done on our servers: cloud renders, Vectorize and Upscale. Your plan gives you new credits every month. Rendering on your own computer and exports don't use credits.

FeatureFreeBasicProUltra
Creditscloud renders, Vectorize, Upscale30 once250 a month2,000 a month8,000 a month
Largest cloud render, long sideNo2500 pxGood quality3000 px3840 px
Render on your own computerNoNoFree, not countedFree, not counted
Exports a monthprint files or spec sheets3 small, with a watermarkin total30150Unlimited
Space for your files50 MB200 MB500 MB2 GB

What it costs: a cloud render 25 credits (Max quality 35, Max above 3000 px 50), Vectorize 10, Upscale 5 (Creative 120). The same picture again is free.

Need more credits? On a paid plan, open Credits at the top of the builder and top up any amount from $10: 100 credits a dollar, +10% from $25, +20% from $50. Bought credits last 12 months. See all plans
Want something improved or added? Tell us.

We read every message. Your ideas decide what goes into the next version. Found something that does not work? Tell us that too.

What is it about?