How to make a hoodie mockup that's ready for print
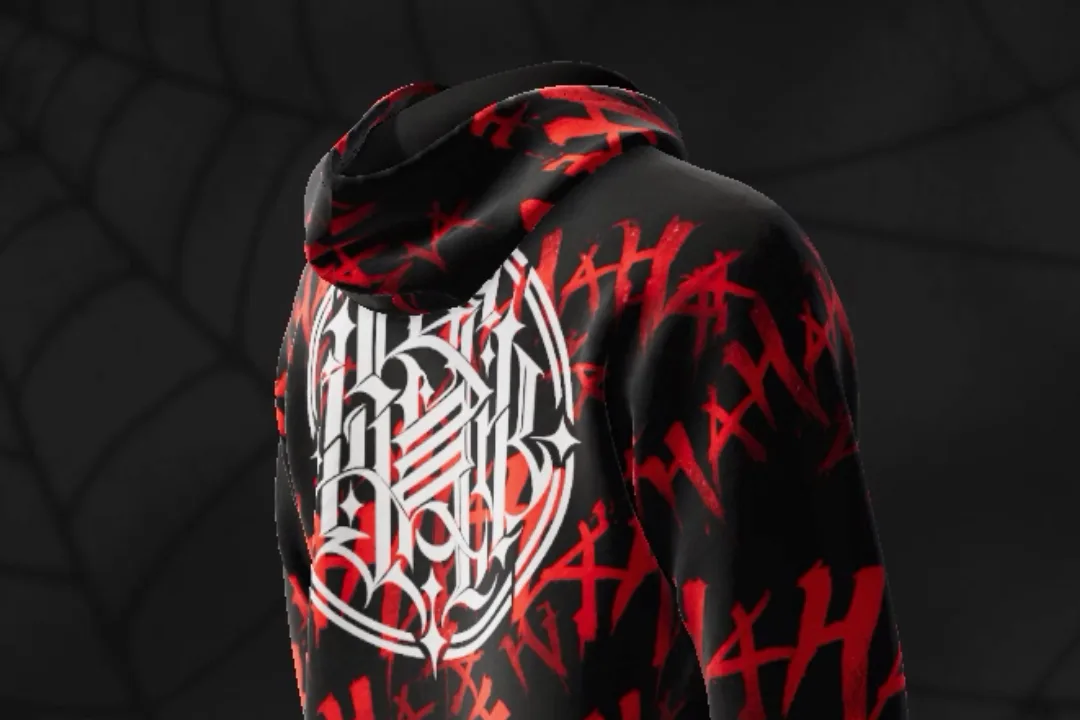
A hoodie is the piece most clothing brands want to get right. It costs more to make than a tee, it has more places to print (front, back, sleeves, hood, pocket) and a mistake shows. A flat picture of a hoodie with your logo pasted on top won't tell you how big that back print really is, whether it wraps onto the side, or how it sits on the hood.
This guide shows how to make a hoodie mockup that you can actually print from: the design goes on the real sewing pattern, you check it in 3D, you make product photos for your store, and you export print files at their real size. We'll use the all-over hoodie from one of our videos as the example: a black hoodie with a red repeating print, red ribbed cuffs and waistband, and a white emblem on the chest and back.
Why start from the sewing pattern
A sewn hoodie is cut from flat pieces. When you design on those pieces, three things become true at once:
- Sizes are real. The builder shows every print in mm, cm or inches, so you know the front print is, say, 26.2 × 32.7 cm before you order anything.
- Placement is honest. If a print crosses a seam or runs into the pocket, you see it on the pattern and in 3D, the same way it will happen on the sewn garment.
- The files match the photo. The picture you post and the file you send to print come from the same project, so the product your customer gets looks like the product they bought.
Step 1. Pick the hoodie and look at its pieces
Open the builder, choose a hoodie and switch to the Sewing pattern view. You'll see every piece laid out flat: front, back, right and left sleeve, the two hood halves, the pocket, and the rib pieces for the cuffs and waistband. Each piece has its name and its size under it.
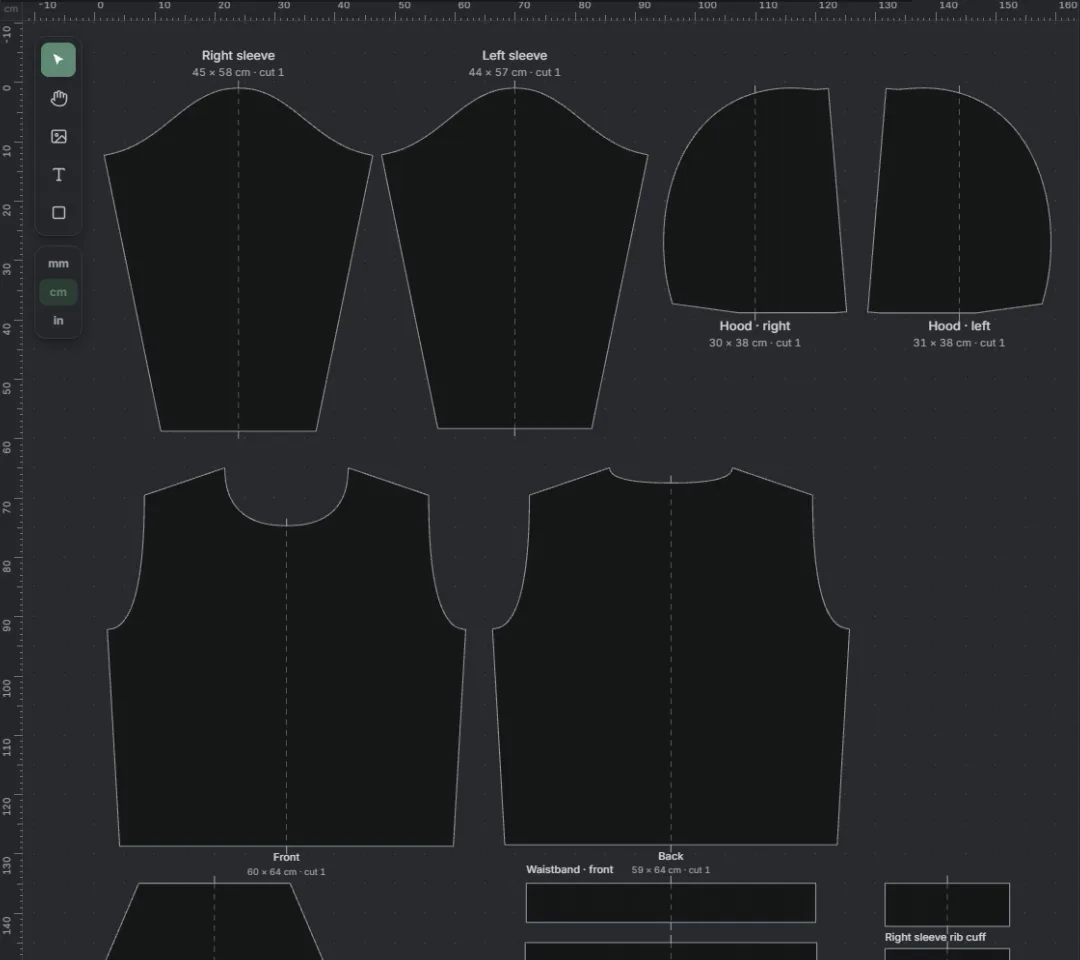
Use Split view if you want the pattern and the 3D hoodie side by side. Every change you make on the pattern shows on the 3D garment straight away.
Step 2. Place your artwork on the front
Upload your design and drop it on the front piece. Drag it to move it and pull the corners to resize it. The size updates as you go, in the units you chose, so you can match the print size your print shop or DTF supplier works with.
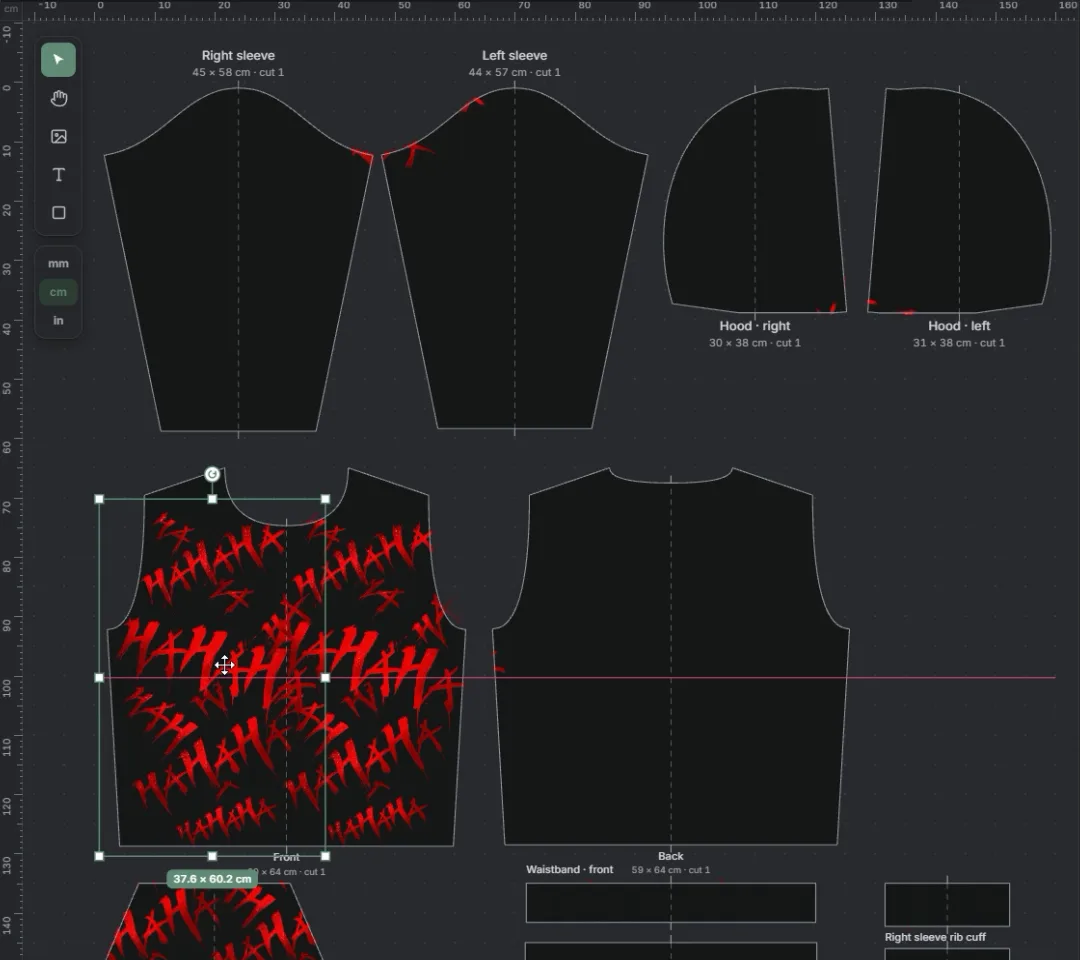
Tip: if your print will be cut by the pocket, check it in 3D now. A logo that sits half under the pocket opening reads very differently on a real hoodie.
Step 3. Cover the rest: back, sleeves, hood and pocket
For an all-over look, repeat the artwork on every piece. For a classic hoodie you might only add a back print and a small sleeve detail. Either way, each piece is its own print area, so you control exactly what goes where.
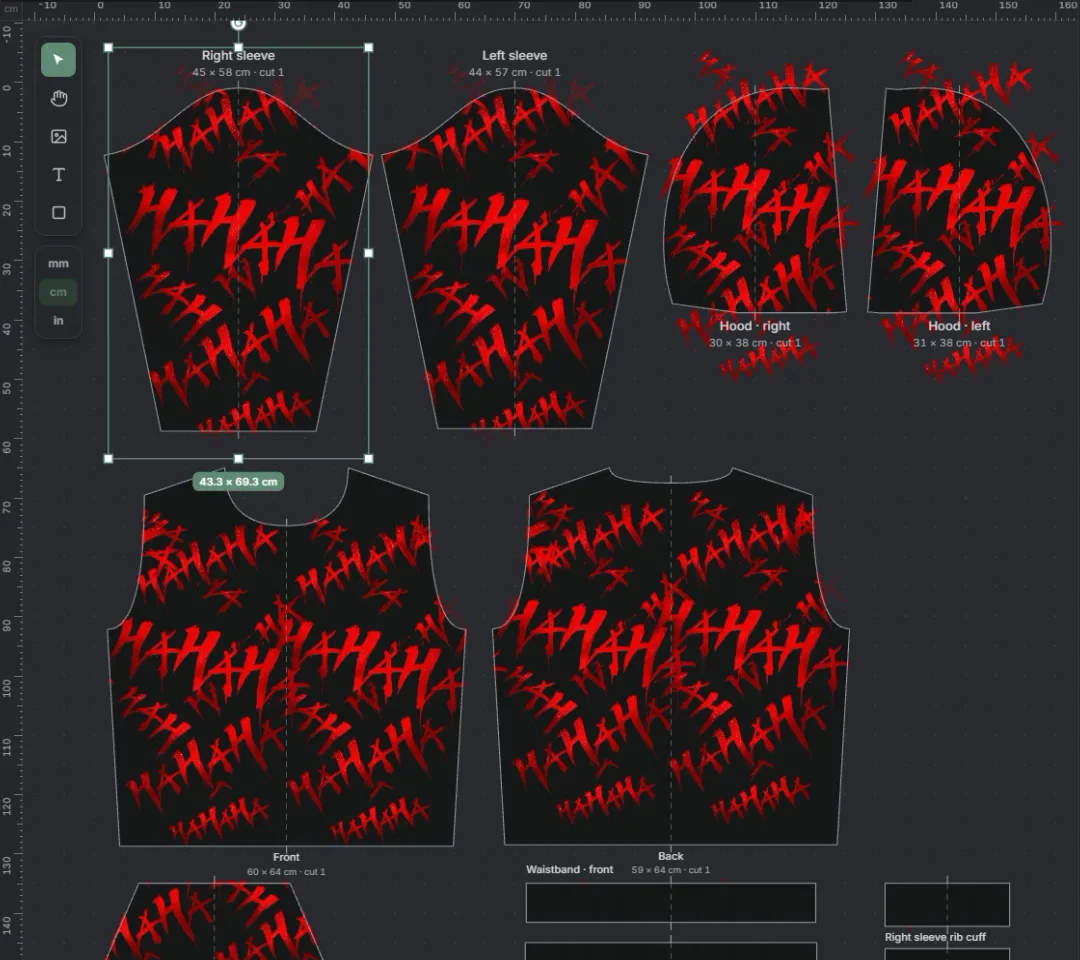
If your design should continue across the side seams onto the back, use Wrap over seams. The artwork carries on the way it would on a sewn garment, and the print files follow the same split.
Then add the details that make it look like your brand. In our example a white emblem goes small on the chest and large across the back.
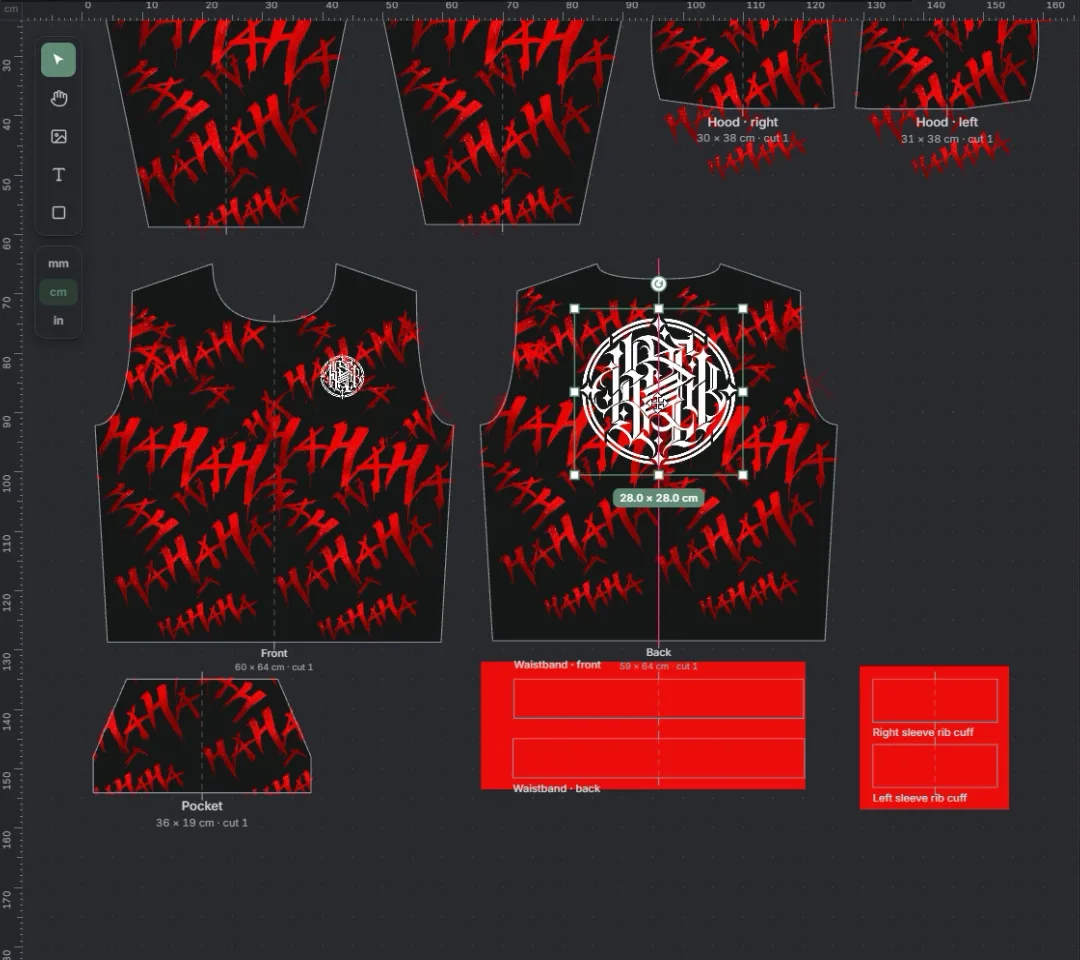
You can also put your logo on the label inside the neck. It shows in 3D and comes out as its own print file, ready for a neck print.
Step 4. Check it in 3D
Now look at the hoodie the way your customer will. Turn it, zoom into the hood and the cuffs, and check that nothing important disappears into a seam or a fold.
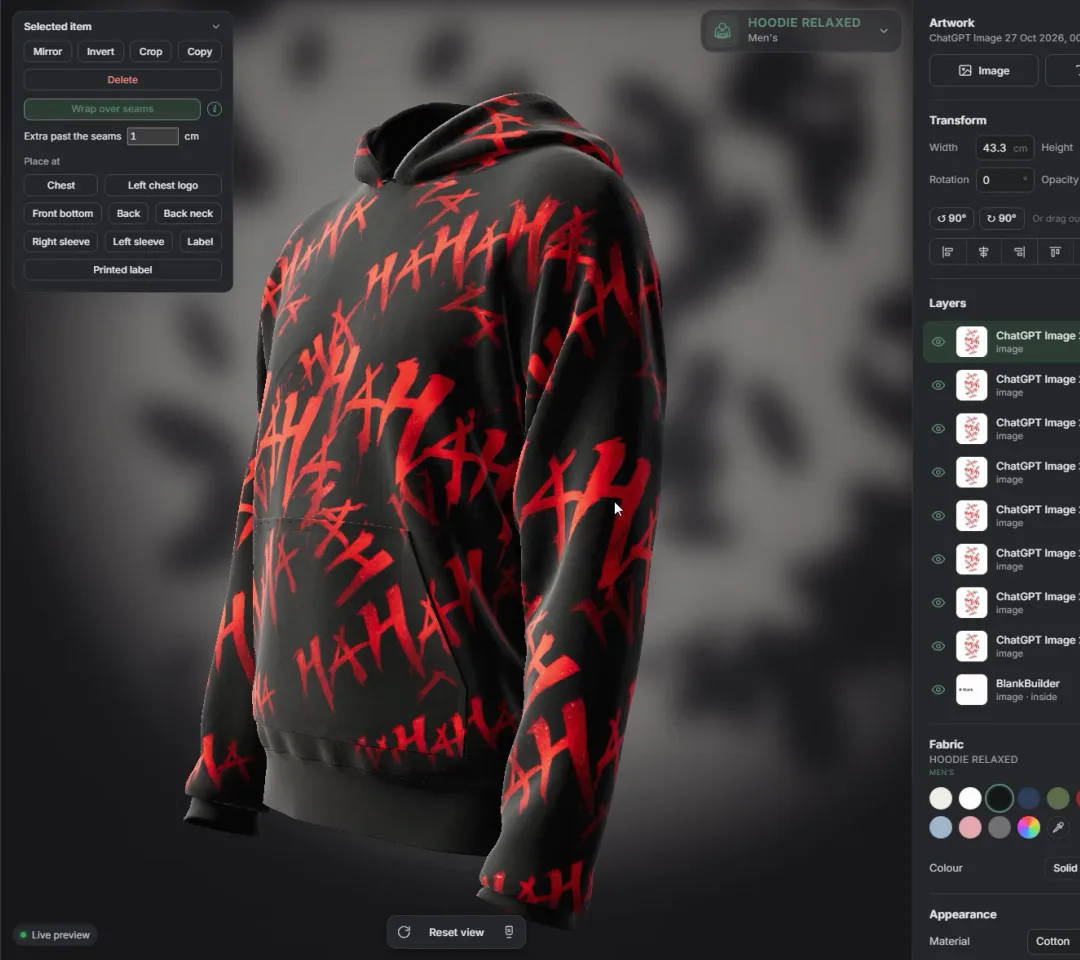
This is also where you make the hoodie feel real:
- Fabric colour. Set the base colour of the fabric. For an all-over print on black, black fabric keeps the gaps between the letters deep.
- Material. Under Appearance, choose fleece / French terry for a classic hoodie. The surface in 3D and in photos changes with it.
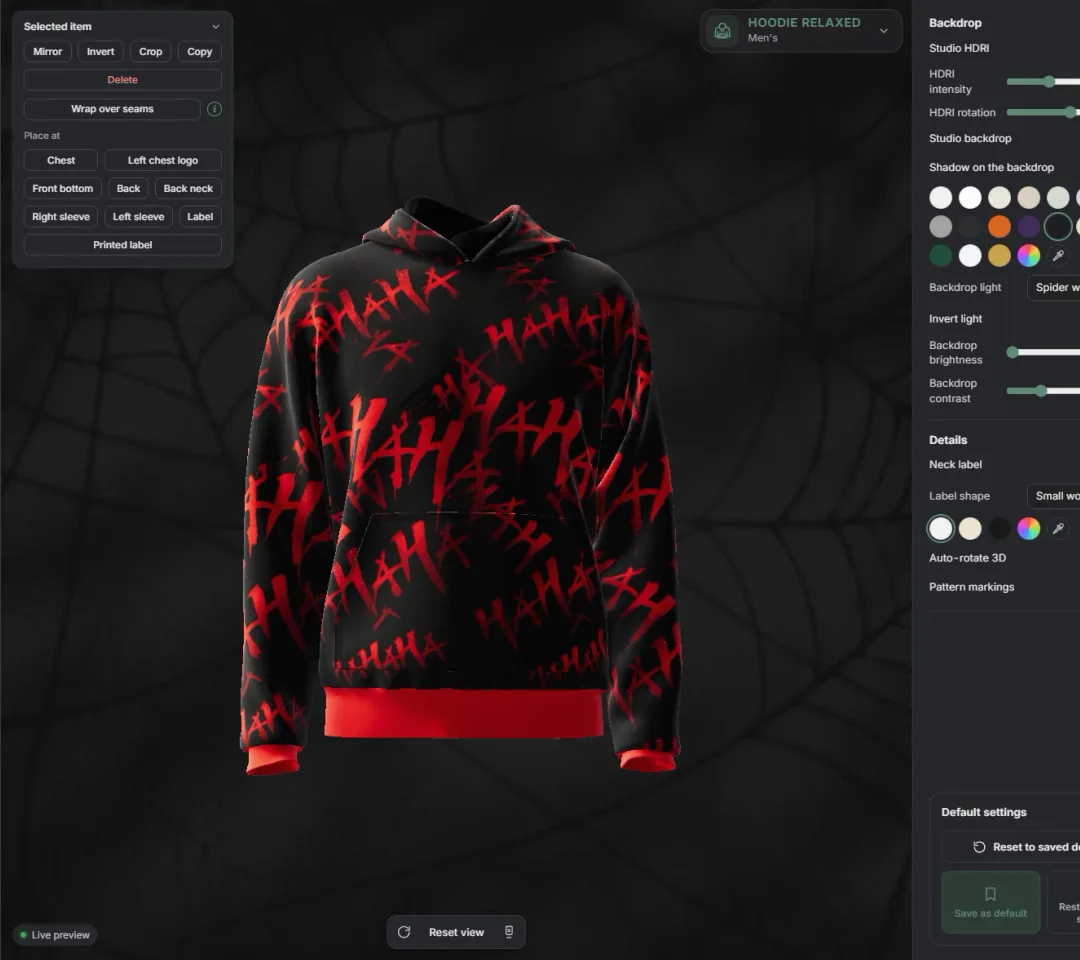
- Rib trims. Cuffs and waistband have their own rib knit, and you can colour them separately. In our example they're red to match the print.
- Wrinkles and texture. Turn them up for a worn, relaxed look or down for a crisp new garment.
Step 5. Make the product photos
Once the design is right, set the scene: the backdrop colour, the light (window, blinds, leaf shadows and more), how bright the paper is and how strong the shadows are. Then render a studio photo. On paid plans the render runs on our servers, so it works even on an old laptop, and you can close the window while it works.
Because the design sits on a real 3D garment, you can render the same hoodie in every colour of your range with identical light and framing. Your catalogue looks like one shoot, without sewing a single sample.
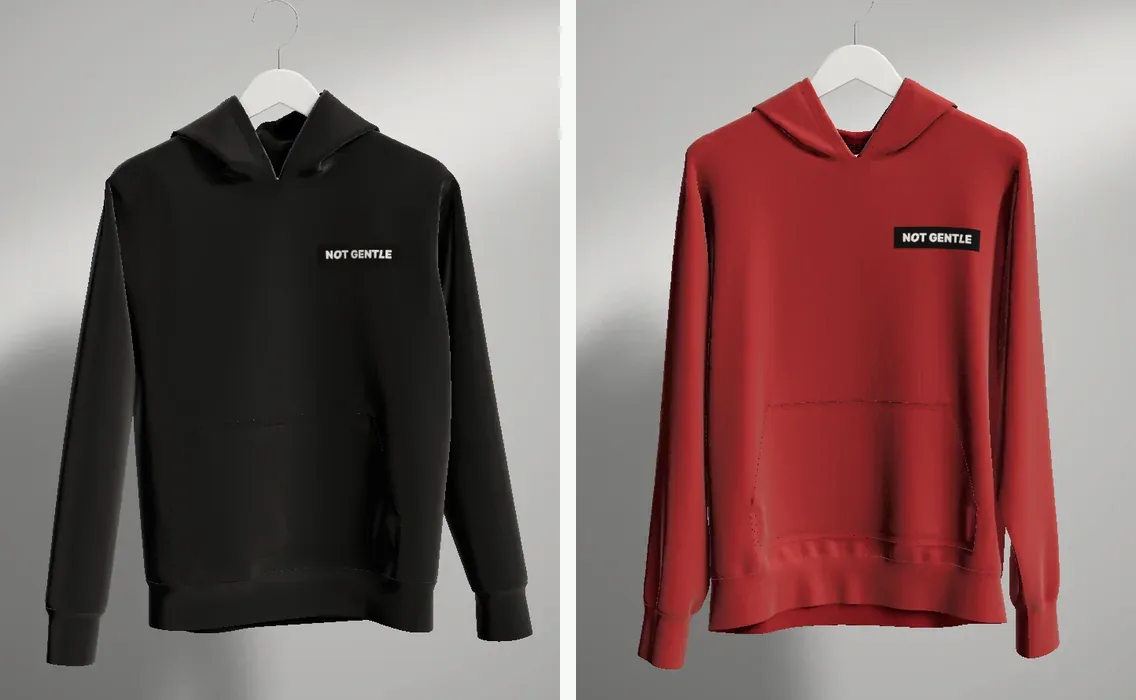
For social media, export a turntable video: a short 360° turn of your hoodie in 9:16, 4:5 or 1:1, one turn in 6, 8 or 10 seconds.
Step 6. Export the files for printing
This is the part a picture alone can't give you. From the same project, export:
- Print files (ZIP). Every print as its own PNG at real size and 300 DPI, named with the garment part and the size, for example
front_26.2x32.7cm.png. Send them to any print shop or DTF printer with nothing to resize. If you uploaded vector artwork, you also get it back as vector at real size. - Spec sheet (PDF). A page with the size and position of every print on every piece, in cm or inches, for your sewing workshop or factory.
- Sublimation panels (ZIP). For all-over prints like our example: each pattern piece as one full file at 300 DPI, filled edge to edge, with 5, 10 or 15 mm of bleed, an optional dashed cut line, and a mirrored version for transfer printing.
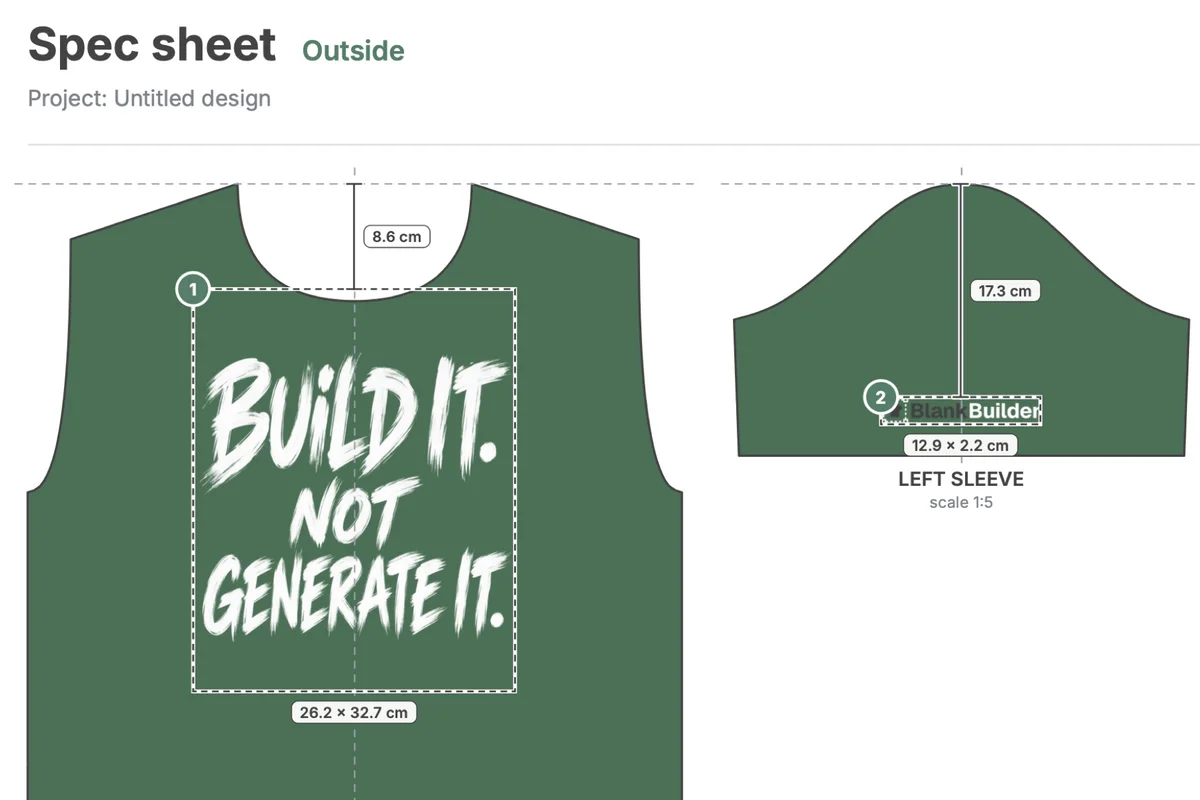
Your blanks are a different size from the pattern? When you export, tick My shirt is a different size and enter the width of your garment's front: lay it flat and measure straight across at the widest point. The print files and the spec sheet are scaled to fit.
A quick checklist before you print
- Every print is on the right piece, and nothing important sits on a seam, under the pocket opening or in the hood fold.
- The print sizes match what your print shop can do. Check their maximum print area for the front and back.
- Your artwork is sharp at its real size. The builder warns you before download if a picture would print blurry.
- The rib colour, fabric colour and material match the blank you'll actually buy.
- You have the Print files ZIP and the Spec sheet PDF for the print shop, and the product photos for your store.
That's a hoodie you can sell before it exists and print exactly the way it looks: the same design, the same sizes, from one project.
Questions
Is a hoodie mockup in BlankBuilder made with AI?
No. Your own artwork is placed on a 3D hoodie built from a real sewing pattern. Nothing is generated or redrawn, so the design stays sharp and exactly where you put it.
What do I send to the print shop?
Export Print files: a ZIP with every print as its own PNG at real size and 300 DPI, named with the garment part and the size. Add the Spec sheet, a PDF with the size and position of each print, for sewing and production.
Can I print the hood, sleeves and pocket too?
Yes. The hoodie pattern has the front, back, both sleeves, both hood halves and the pocket as separate pieces, and you can put artwork on any of them, plus the label inside the neck.
Which plan do I need for hoodies?
Hoodies are on the Pro and Ultra plans. The Free plan lets you try the builder on the classic tee with no card.