How to make a T-shirt mockup from your own design
You already have the design. What you need now is a T-shirt mockup from your own design that tells the truth: how big the print really is, where it sits on the chest, what it looks like from the side and the back, and what the printer will receive. A flat template picture with your artwork pasted on top answers none of that.
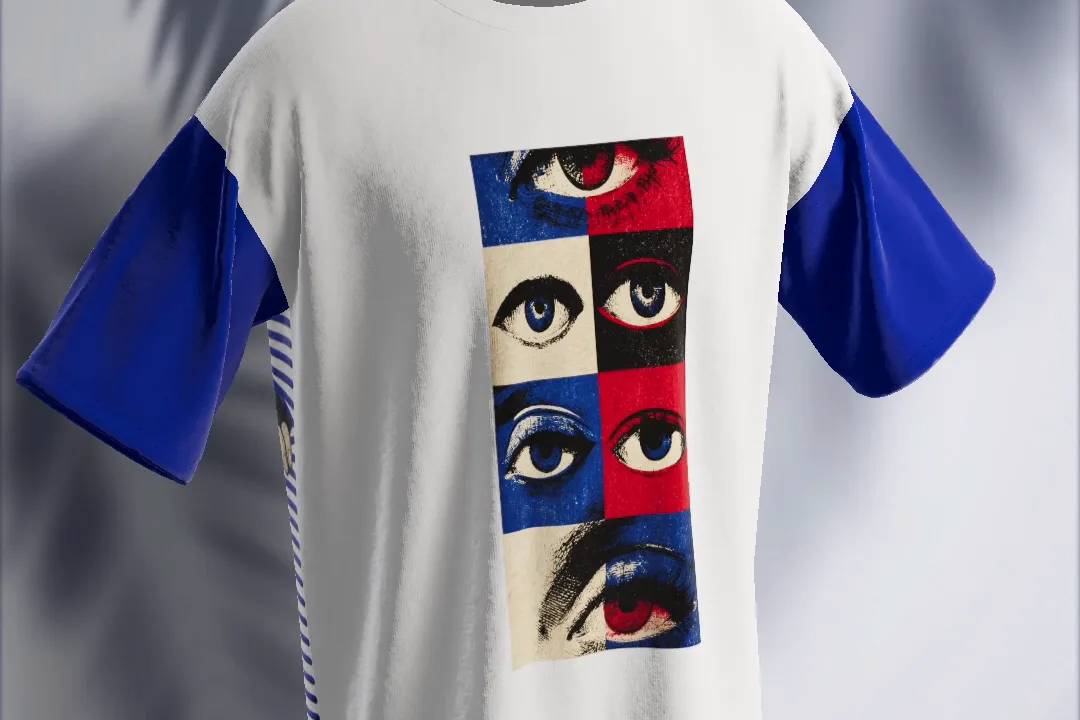
This guide walks through a tee from a blank pattern to a finished 3D garment, using the striped eyes tee from one of our videos: a white oversize crew neck, a tall panel of eyes on the front, stripes with eyes across the back, cobalt blue sleeves and a striped lining inside. Every step happens on the real sewing pattern, so the mockup and the print files come from the same place.
Why a template mockup lies about size and placement
A mockup template is a photo of a shirt with a rectangle where your picture goes. Three things go wrong with it:
- It has no size. The template doesn't know whether its shirt is a small or a 2XL, so the print has no measurement. You guess how many centimetres the artwork covers, and the print shop asks you anyway.
- It has one view. Front only, in most cases. A back print, a sleeve print or anything near a seam is invisible until the shirt is sewn and printed.
- It bends the picture, not the fabric. The folds are painted on. Your artwork is stretched over them, so letters and lines warp in a way that has nothing to do with how your blank actually drapes.
A T-shirt mockup from your own design should start from the thing a shirt is cut from: the flat pattern pieces. Then every size is real, every piece is a print area, and the 3D garment is sewn from the same pieces you designed on.
Step 1. Choose the tee and open the sewing pattern
Open the builder and pick a T-shirt. The model list has the same tee flat on a hanger, draped and on a body, in a classic, women's, oversize and V-neck cut. For this guide we chose the oversize crew neck on a body. Switch to the Sewing pattern view and set the units to mm, cm or inches with the buttons on the left.
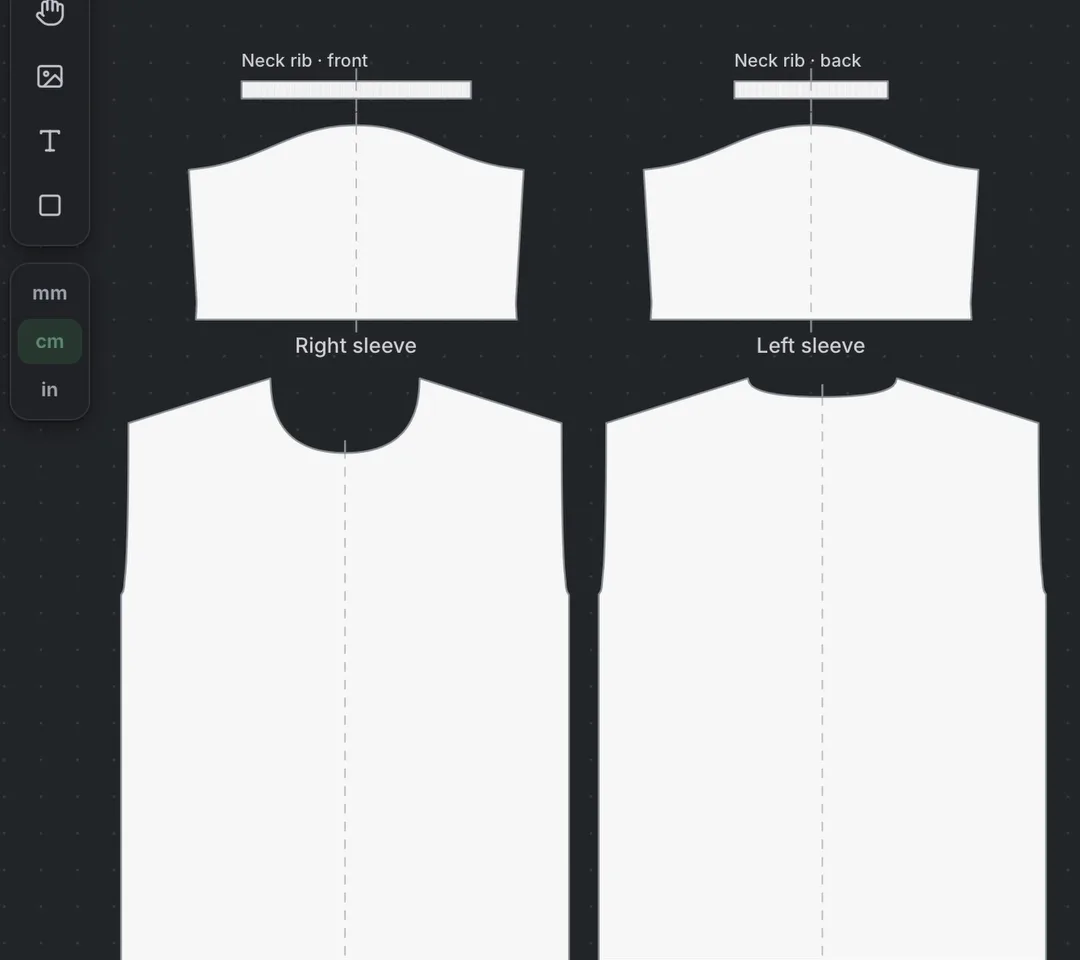
Use the Split view if you want the pattern and the 3D tee side by side. Anything you change on a pattern piece shows on the 3D garment at once.
Step 2. Put your design on the front at its real size
Click Image and upload your artwork: a PNG or JPG, or an SVG, PDF or Illustrator file if you have the design as vector. Drop it on the front piece, drag it into place and pull a corner to resize it. The green badge under the frame is the print size on the finished shirt.
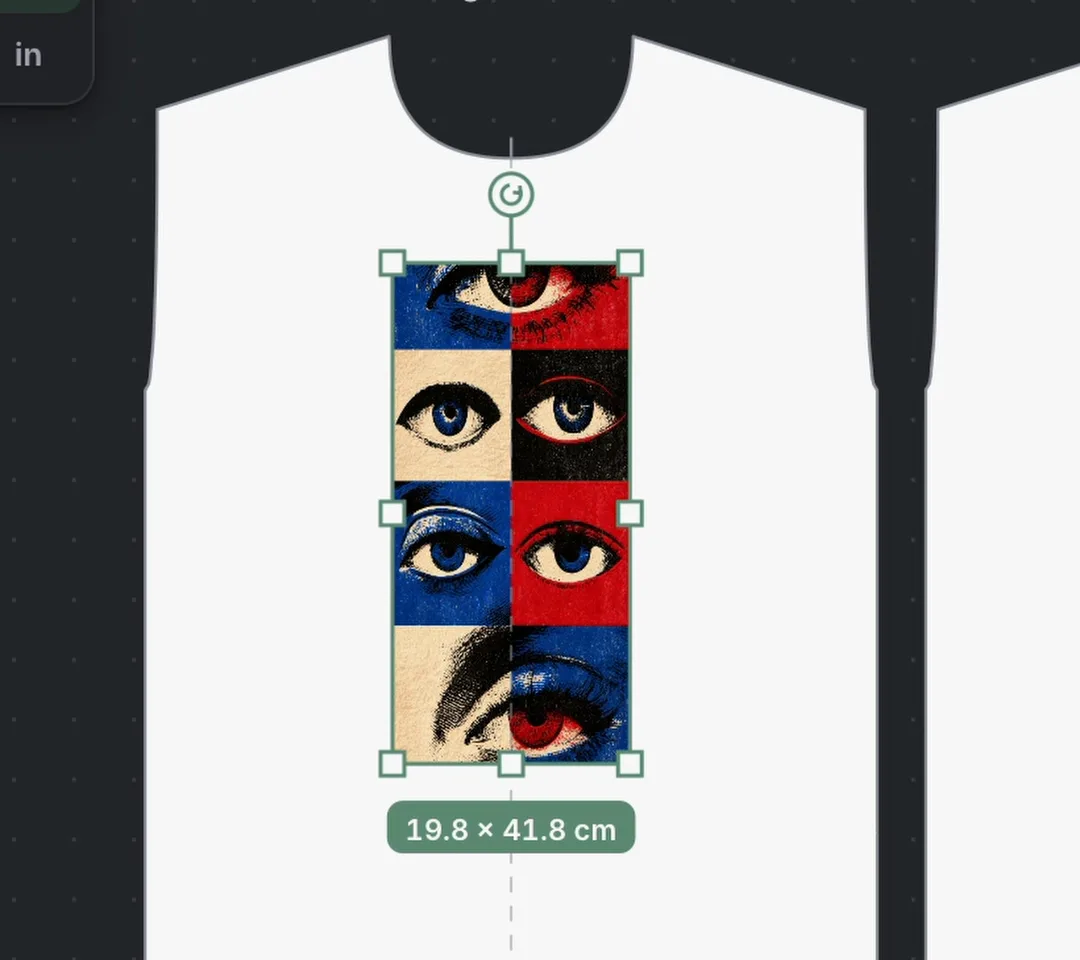
In our example the panel went on at 19.8 × 41.8 cm, then came down to 18.1 × 40.0 cm to leave more white around it. The Transform panel on the right takes the same numbers as typed values, so you can match a size your print shop gave you to the millimetre. The dashed line down the middle of the piece is the centre line; it makes centring a chest print a one-second job.
Tip: check the print size against what your print shop can do before you fall in love with a placement. A 40 cm tall print is fine for many methods, but not every machine prints that tall. Ask for their maximum print area and keep the number next to you.
Step 3. Check it in 3D
Now look at the tee the way a customer will. Turn it, zoom in on the chest and watch how the panel sits on the body. Because the 3D garment is sewn from the same pattern, the print is exactly as big and exactly where you put it, folds included.
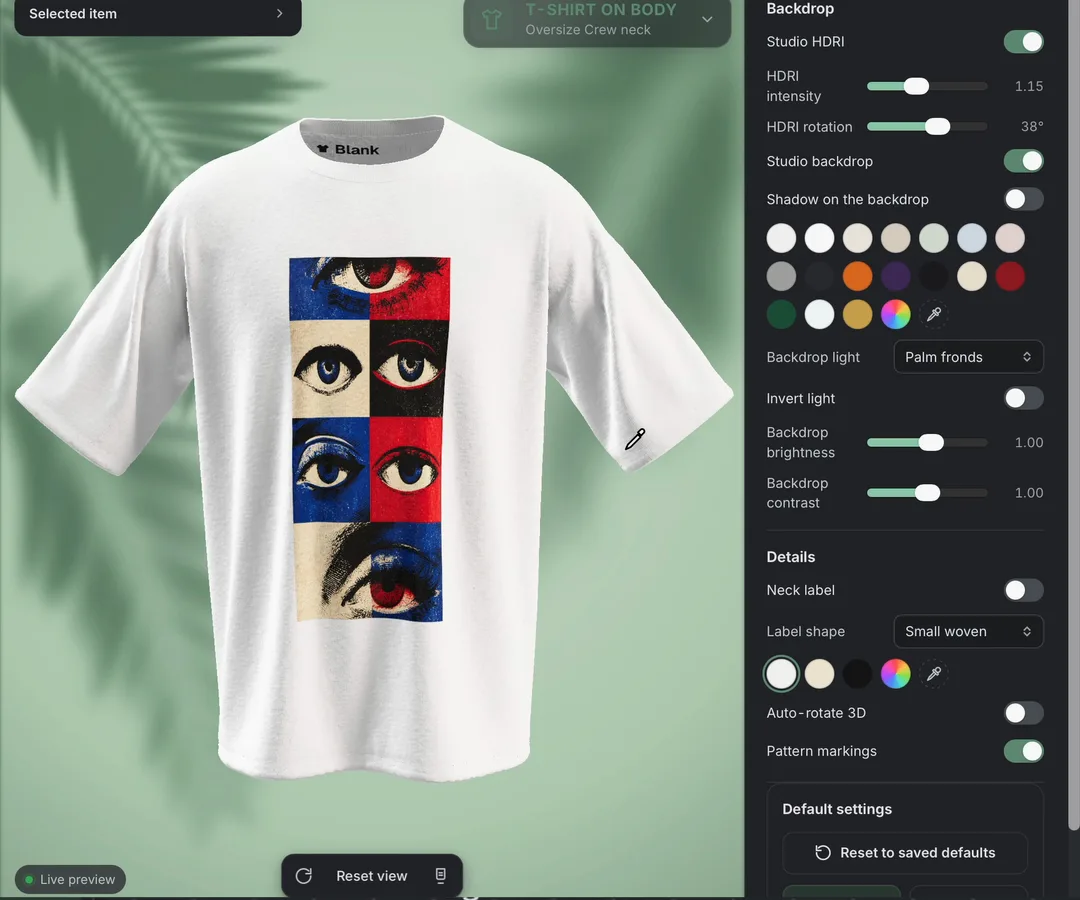
This is the moment to make decisions you can't make on a flat picture: is the print too low for an oversize cut, does it fight with the neck, would it look better smaller. Move it on the pattern, and the 3D view follows.
Step 4. Add the back, the sleeves and the inside
Each pattern piece is its own print area, so the back, the sleeves and even the inside of the shirt are one upload away.
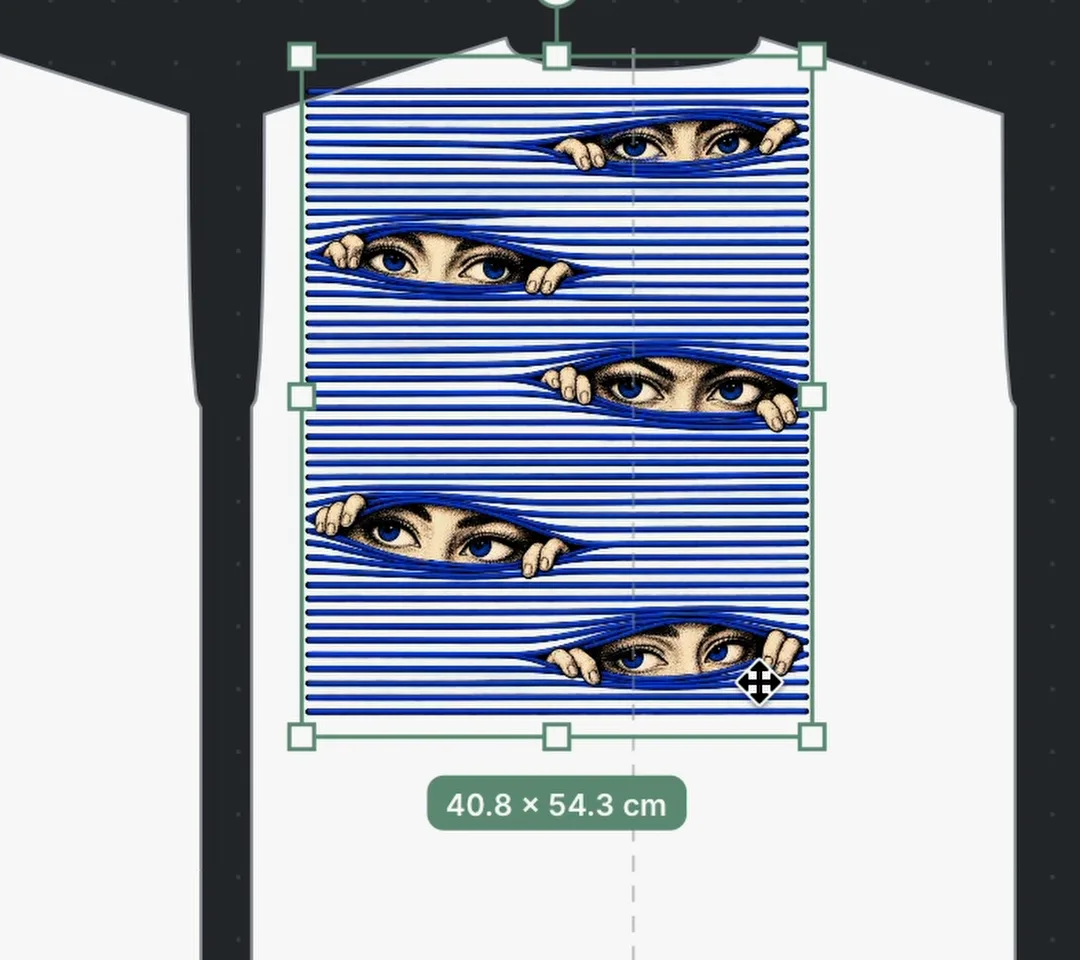
For the back of our tee the stripes picture was stretched across the piece to 40.8 × 54.3 cm, so it runs from under the neck rib to the hem. If a print should carry on across the side seams onto the next piece, turn on Wrap over seams: the artwork continues the way it would on a sewn shirt, and the print files follow the same split.
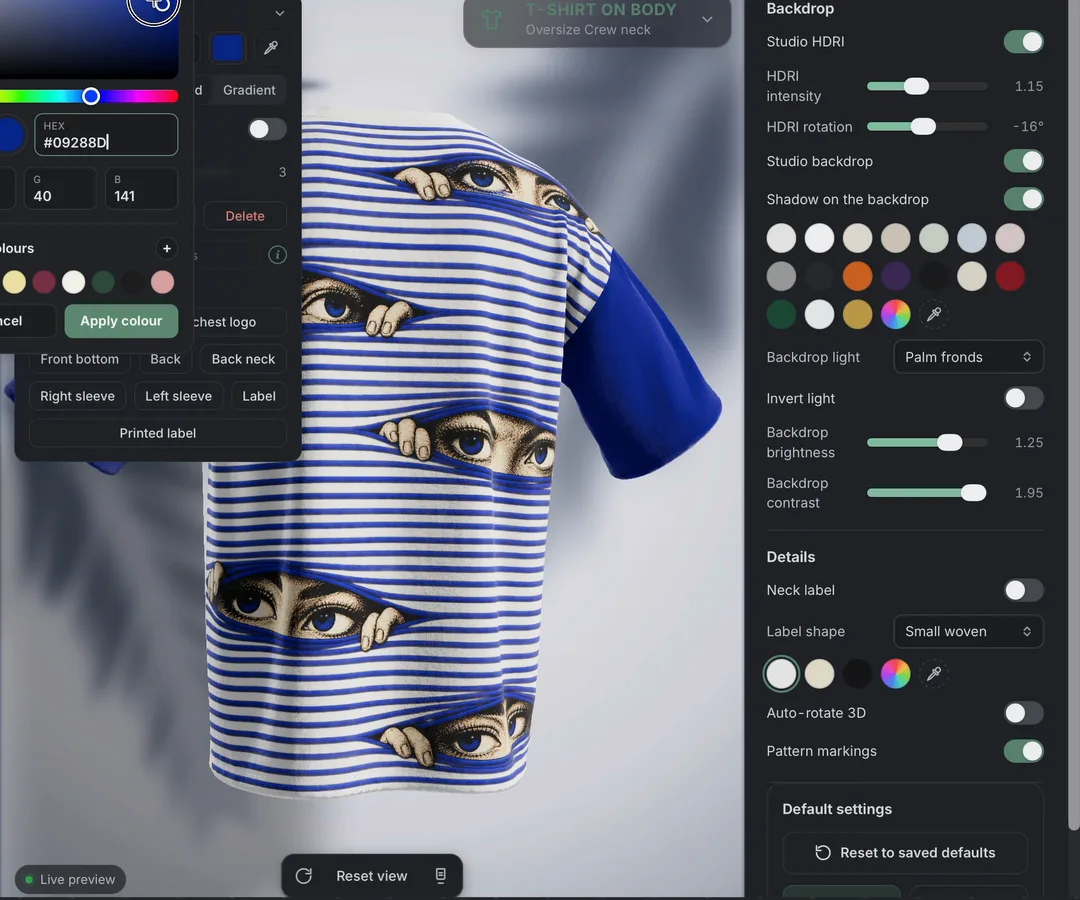
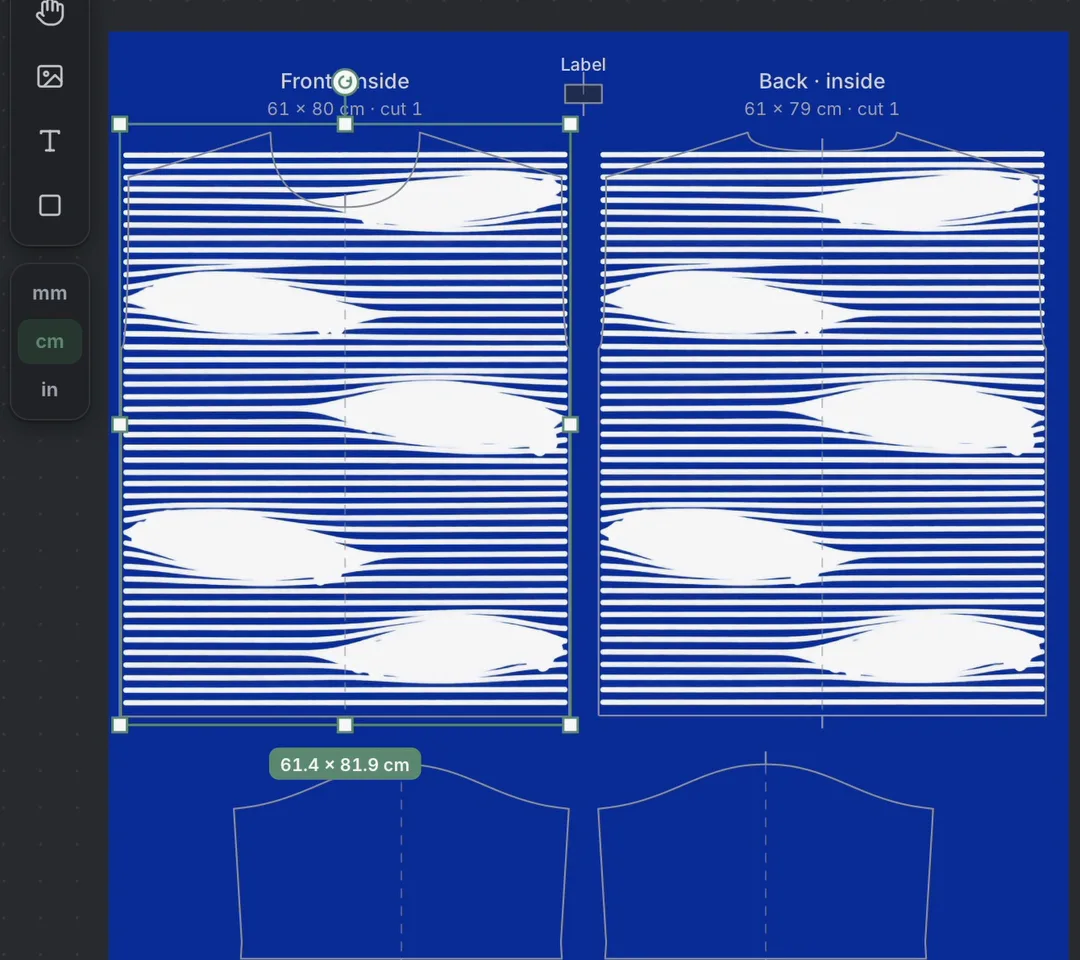
The blue sleeves are one filled block laid across both sleeve pieces, 120.9 × 31.3 cm, with its colour picked in the colour window. You could do the same with a picture or a text layer. Then flip the pattern to the inside: the front and back inside pieces are listed with their own sizes, 61 × 80 cm and 61 × 79 cm on this model, and you can print a lining or a size label there. In our tee the stripes went inside too, inverted to white on blue.
Step 5. Make the fabric look like your blank
A mockup is only honest if the fabric matches what you will buy. Under Fabric, pick the colour of the blank, or Gradient to blend it from top to bottom. Under Appearance, choose the material: cotton for a classic tee, interlock, piqué, rib knit, waffle, fleece or sport knit for other garments. Then set the wrinkles, texture and knit size so the surface looks like your fabric and not like plastic. Rib trims at the neck have their own knit texture, and you can turn on a label inside the neck and print your logo on it.
Step 6. Photos, a video and the files to print it
When the design is right, set the scene: the backdrop colour, the light (window, blinds, leaf shadows, palm fronds and more), how bright the paper is and how strong the shadows fall. Render a studio photo for your store. On paid plans the render runs on our servers, so it works on an old laptop, and one click sets the recommended catalogue size, 2000 × 2500.
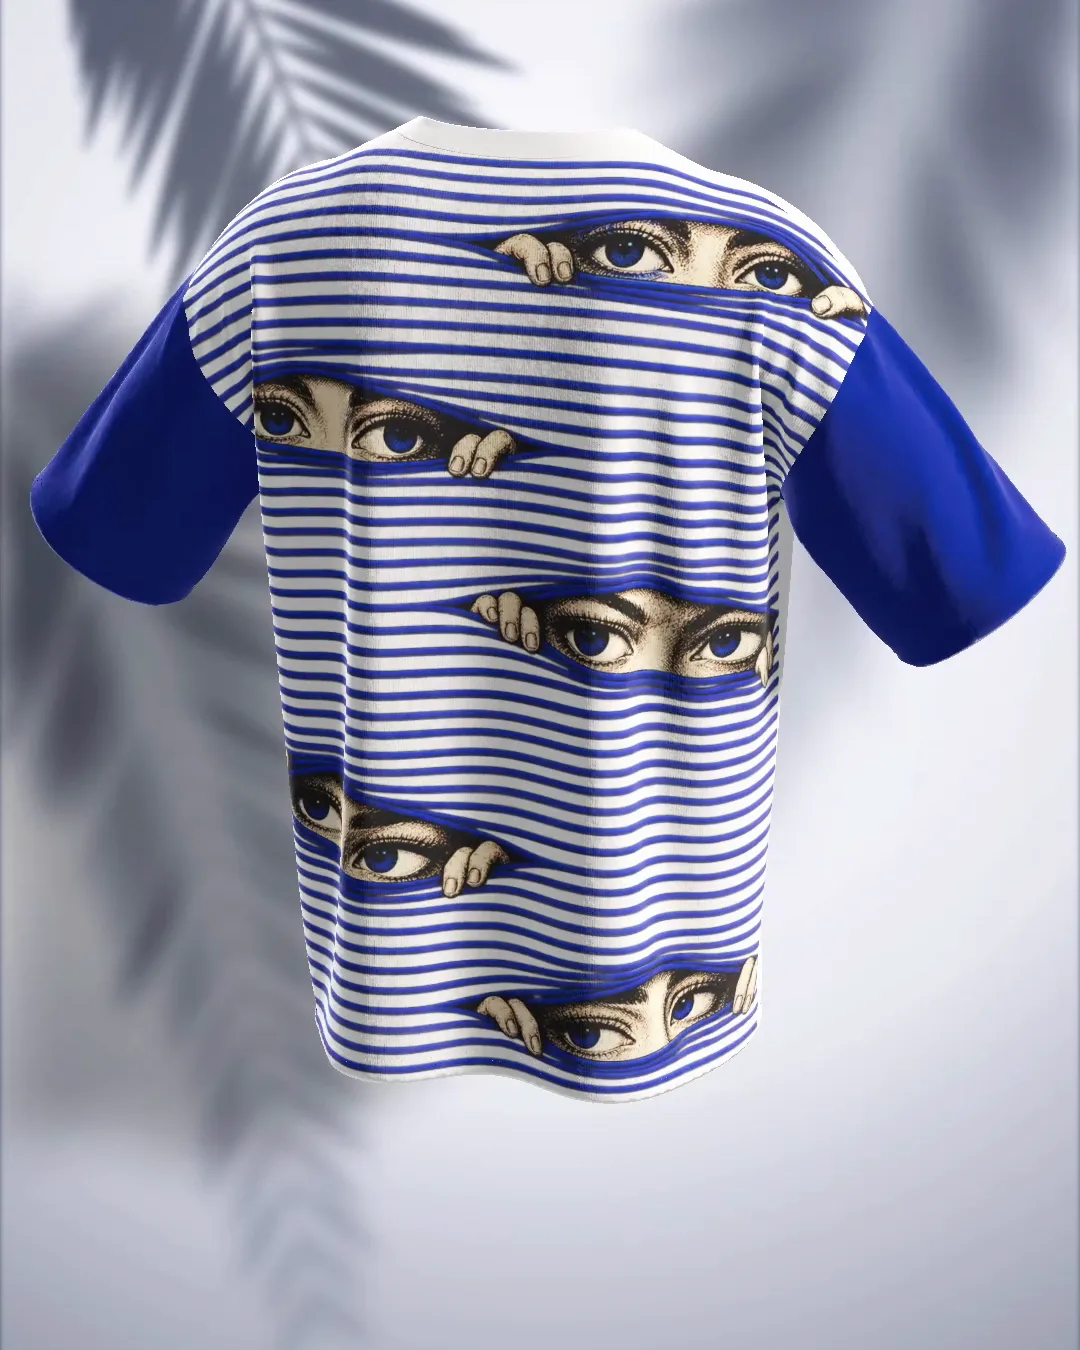
For social media, export a turntable video: a full turn of the shirt in 9:16, 4:5 or 1:1, one turn in 6, 8 or 10 seconds.
And then the part a picture can't give you. From the same project, export Print files: a ZIP with every print as its own PNG at real size and 300 DPI (DPI is how sharp the print is), named with the garment part and the size, so the front panel comes out as a file of exactly 18.1 × 40.0 cm with nothing to resize. Vector uploads come back as vector at real size next to the PNG, and text and shapes made in the builder come out as SVG with the letters turned into outlines. The ZIP also holds the Spec sheet, a PDF with the size and position of every print on every piece, for a sewing workshop or a factory. If your blanks are a different size from the pattern, tick My shirt is a different size when you export and enter the width of your shirt's front; the files and the spec sheet are scaled to fit.
If you make hoodies as well, the same steps apply to a hoodie's hood, pocket and sleeves; see how to make a hoodie mockup that's ready for print. Everything mentioned here is listed by version on the What's new page, and the plans are on the pricing section.
A quick checklist for your T-shirt mockup
- The print sizes on the pattern match what your print shop can print. Write the numbers down.
- Nothing important sits on a seam, in the armpit or under the neck rib. Check it in 3D from the front, the side and the back.
- The fabric colour and material match the blank you will order.
- Your artwork is sharp at its real size. The builder warns you before download if a picture would print blurry.
- You have the studio photos for your store, the Print files ZIP for the printer and the Spec sheet PDF for production, all from one project.
That is a T-shirt mockup from your own design that you can show, sell and print: the same artwork, the same sizes, on the real pattern.
Questions
Is a T-shirt mockup made this way an AI picture?
No. Your own file is placed on a 3D T-shirt built from a real sewing pattern. Nothing is generated or redrawn, so the artwork stays sharp and exactly where you put it.
How do I know the real print size?
The builder shows the size of every print in mm, cm or inches right on the pattern, and the numbers update as you move or resize it. Print files export each print at exactly that size, at 300 DPI.
My blank T-shirt is a different size. Does that matter?
When you export, tick My shirt is a different size and enter the width of your shirt's front, measured flat across the widest point. The print files and the spec sheet are scaled to fit.
Which plan do I need for T-shirts?
The classic tee is free to try, with no card. The other T-shirts, including the oversize crew neck in this guide, are on the Basic plan and above.